Staring Plants Indoors - Seed Germination and Seedling Care
About Starting Plants Indoors
The upcoming garden season is going to be a great one. Are you starting plants indoors this year? We sure hope so! Why let nurseries and garden stores have all of the fun of starting plants indoors? Starting your plants is fun and rewarding, Furthermore, it saves you money. So, determine what you want to grow this year and acquire the seeds you need. Then, determine when to start planting indoors for transplanting later into your flower and vegetable gardens.
Mother Nature has her way of germinating seeds. In the field, she provides warmth from the sun, moisture from the clouds, and nutrients in the soil. Mother Nature also has a way of disappointing us from time to time, by either not bringing one of the essential ingredients, or bringing too much all at once.
Some seeds are best planted directly into the garden. Some plants are better off with a healthy head start indoors. The length of growing time in your area may be shorter than the time the plant needs to bear fruit or to flower, making an indoor start a necessity.
The steps below will ensure and maximize successful indoor planting and seed germination.
Starting Plants Indoors - Why?
Many flowers and vegetables are started indoors. But, do you know the reasons and benefits that will help you determine which plants to start indoors?
First, the growing season in many areas is shorter than the time the plant needs to produce flowers or fruit. Indoor planting allows many gardeners to grow plants and varieties that are not native to their area.
Extending the harvest is another major reason why gardeners start plants indoors. Many flowers and vegetables produce weeks earlier if started indoors. Marigolds, for example, benefit by flowering earlier than if direct sowing. They will continue to produce flowers right up to the first frost. Additionally, second-season fall crops may need the benefit of a few days’ head start indoors.
For example, every gardener strives for that first tomato or cucumber of the season. It tastes so delicious, and we can hardly wait. Additionally, there is friendly neighborhood pride and bragging rights, associated with being the first to produce homegrown tomatoes for the season.
Healthier seedlings become stronger and better plants. Give a seedling a healthy start, and it will pay you dividends all season long. That healthy start often comes from a properly controlled, indoor environment.
Simply because it’s fun. Like any hobby, gardeners enjoy every aspect of gardening. There’s a challenge to growing difficult to start petunias or peppers, and putting out a seedling that is better than you can find in any gardening store. It also extends the hobby into those late winter and early spring months, when most gardeners are chomping at the bit to get some dirt under their fingernails.
Starting Plants Indoors - When to Plant
The general rule of thumb is to start transplants indoors six to eight weeks before the last frost date for your area. Some plants, such as peppers and petunias, require even more time. Other plants, like the cabbage family and head lettuce, require less time. Some people make a series of plantings, especially for lettuces and cabbages, to create succession plantings and to extend the harvest. Ten heads of lettuce in two weeks are just too much for most families. However, one or two heads of lettuce a week is just right.
Gardening Tip: Check the instructions on the back of the seed packet. It usually provides a recommendation of indoor planting times, and “days to germination”. Ultimately, experience will help you to fine-tune when to start them.
Sprouting seeds indoors is quicker and more successful when using a heated propagation mat.
Planting and Seedling Germination
The basic steps of indoor seed starting and germination are:
Viable seeds – Good seeds that are not hollow, and are not so old that germination rates are poor. Some seeds can remain viable for years if stored properly. Others normally last only a season in storage.
Soil – Use a good, seed starting mixture, that is light and sterilized.
Water – The soil should be moist, but not soaked.
Warmth – Growers can easily increase their success by providing the ideal temperature for germination. The ideal seed starting temperatures vary by type of seed. Most are between 70 to 85 degrees Fahrenheit. Some seeds, like peas and early season vegetables, will germinate at lower soil temperatures, even as low as the fifties. Sprouting seeds for other garden plants, like pumpkins and peppers, require temperatures on the higher end to induce them to sprout. Seeds can be germinated outside of their ideal range, but the further away from the ideal range for the particular seed, the lower the germination rate.
Garden Tips: Test your seed for viability in advance, especially if you have saved seed from last year. Plant a few seeds well before the normal planting time. Count the number you planted and the number that germinate. The resulting percentage is your expected germination rate. More on seed germination tests.
Starting Plants Indoors - Steps to Successful Seed Germination
Here are our recommended step by step instructions to maximize germination:
Purchase sterilized seed starting mixture. This is a lightweight medium that has all the nutrients your seed needs at birth. Experienced growers often create their own starting mix or amend store-bought soil. This is part of the fun of planting for experienced garden hobbyists. Tip for new gardeners: Stick with the seed starting mix until you gain some experience.
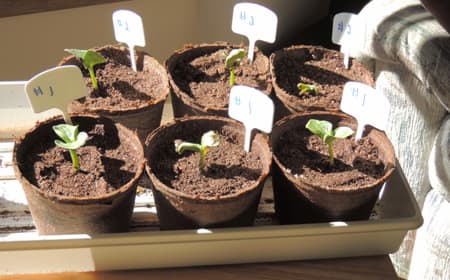
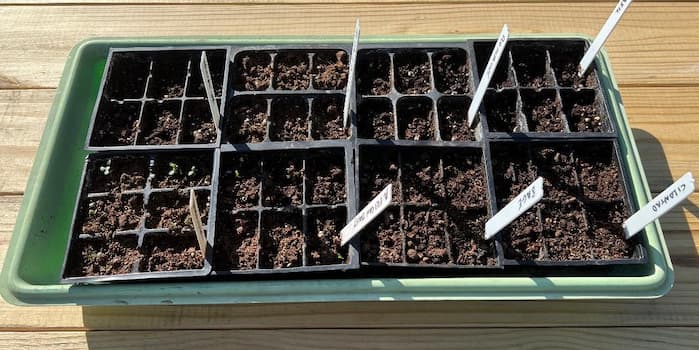
Select the right containers. So what’s the big deal? If you select a container that is too small, your seedling can outgrow its home before you are ready to transplant. A root-bound seedling does not translate into maximum growth. Large paper mache or peat pots promote more open development of roots but separating individual plants later, can result in tearing of roots and increased transplant shock. Using the individualized seed pots and trays helps to minimize transplant shock.
Fill the containers with the seed starting mix and water thoroughly. Make sure the soil is wet, but not soaking.
Plant the seeds. Another seemingly easy step. But, new gardeners have a habit of planting seeds too deep. We recommend planting seeds a little less than the recommended depth. You can carefully add soil around the seedlings at a later point if needed.
Provide bottom warmth to the seeds. Some people use a heating mat, while others put them on top of a warm oven, by the fireplace, or in a sunny window, skipping the expense of a heating mat or other devices.
Creating a seed incubator is also popular. Create a wooden or plastic enclosure large enough to hold the containers you are using. Put a light inside the enclosure. The heat from the light will raise the temperature and create a greenhouse effect. It is important to measure the temperature to make sure it does not get too warm. Temperature varies depending upon room temperature, the wattage of the light bulb, and the size of the enclosure.
Now the wait begins! The time required to germinate may be a few days to a few weeks. For seeds with a long germination period, we recommend you plant in smaller groups over a couple of weeks. This way if the first group does not germinate, you won’t be waiting three weeks to find out.
Seedling Care and Nurturing
As your seedling emerges from the soil, most growers breathe a big sigh of relief. Close your eyes, and you can almost see the plant grow and flourish into its full beauty, producing an enviable profusion of flowers or vegetables. As you open your eyes, you will immediately begin a new set of worries, over-nurturing the newborn seedlings indoors for a short time while the outdoor weather catches up with your dreams.
Thin Seedlings as needed- – Plants in your garden do not like to be crowded. Ditto with your seedlings, who need all the sun and nutrients that they can get. You may want to leave a few extras for a while, as the mortality rate of seedlings can be high.
Let there be light, and plenty of it- – As soon as the newborn seedling begins to emerge, it seeks light. Newborn seedlings require as much light, and as direct a light source, as possible. Placing the plants by a window with southern exposure is the first step. This alone may not prove to be enough, for the seedling to grow healthy and strong. First, the sun is not up as long in the spring as it is in the summer. Second, there are many rainy spring days with little or no direct sun. You should also acquire an artificial Grow Light. Place the seedlings under it, on cloudy days and at night.
Let There be Water, in just the right amount- – Provide water to your seedling every couple of days. Do not soak the soil each night. Overly wet soil encourages the development of damping-off disease. Let the soil dry out a little on the top, then water thoroughly. Watering from the bottom is preferred. For seed trays, add water to the bottom of the tray. The soil will absorb it through the bottom holes in your container…your container does have holes in the bottom, doesn’t it!?!
Feed me, feed me- – The seedling does not need a lot of extra nutrients in its first few days of life. Your soil starting mix usually comes with a balanced formula of nutrients that the seedlings need. After several days, adding a little liquid fertilizer to the water is helpful, but you do not need to give it full strength.
If the roots begin to come out the bottom of the pot, it is time to plant your seedling outdoors, weather permitting. If it is still too cool, keep the bottom of the tray moist, or put some extra soil in the bottom of the tray. Or, transplant seedlings to a larger pot. Most plants do not like to be root bound. How to transplant seedlings outdoors.
Guard against Leggy Plants- – Seedlings are leggy when their main stem or stalk grows tall and thin and can hardly support the leaf structure. It is caused by insufficient sunlight and a sheltered environment. Indoors, they do not experience the effect of wind and do not need to develop a structure to defend against it. Most seedlings do not even experience a slight breeze. When transplanted outdoors, “leggy” plants can be damaged or broken by the wind.
Garden Tips: Take your hand, or a couple of sheets of newspaper and fan the plants a few times a day. You can even lightly brush the tops of the plants, brushing back and forth in varying directions. You may notice the plant growth seems to slow down for a period. What they are really doing, is building a stronger stem or stalk.
Let There Be No Damping-Off Disease
Staring Plants indoors is not without potential problems. Those of us who have grown seedlings indoors for any number of years, know what “Damping Off” disease is. This is a white mold that forms on the top of the soil. Damping Off Disease flourishes in cold, wet damp weather along with little sunshine. It quickly spreads across the soil and wilts the seedling. Take its habitat away, and the disease can not survive. Plants, on the other hand, love just the opposite conditions. The more you make conditions ideal for your plants, the more likely you will avoid Damping Off Disease and other mold and fungal problems.
If you do experience problems, do not give up hope. Here are some things you can do to minimize or eliminate disease problems:
First, get the plant in direct sunlight if at all possible.
Allow the surface of the soil to dry out, in between watering.
Water only from the bottom.
If you see a white or gray mold, scrape as much of the mold off the soil as possible.
Stir the top of the soil without disturbing the roots. It will also speed drying.
Add some soil, although this may or may not produce results.
Increase room air circulation. You can gently blow air on your plant trays with a small fan.
Avoid sowing your seeds in the basement and leaving them there for a couple of days. While the trays are conveniently out of the way, this is a perfect breeding ground for Damping Off Disease.
Subscribe To Our Newsletter
Please support our site. Shop for:
How To Grow
Other Gardening
Our Community
Contact Us
- rmmatthews100@hotmail.com
- 585-721-6528
- Rochester, NY
©1999-2026 GardenersNet.Com, All Rights Reserved