Planting a Garden
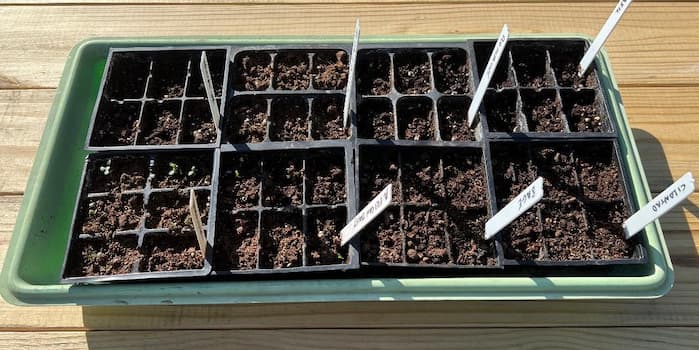
Planting a Garden Indoors
Mother Nature has her way of germinating seeds. In the field, she provides warmth from the sun, moisture from the clouds (or your garden hose or sprinkling can), and nutrients in the soil. Mother Nature also has a way of disappointing us from time to time by either not bringing one of the essential ingredients or bringing too much all at once. Consequently, planting a garden indoors to transplant later, is a great option for many plants.
Many vegetables and flowers benefit from being started indoors. Growing seedlings indoors provides the plant a jump start on the season and is especially necessary for areas with a shorter growing season. Indoor planting is a more controlled environment and when done right will produce strong and healthy seedlings timed perfectly to place outdoors after the last frost.
For the grower, indoor planting can and should be fun. It allows you to start your gardening season a little sooner than people who buy their seedlings from the garden store. Can you match the health and quality of garden store seedlings? Absolutely! And, you can save money while having the fun of watching your seedlings grow.
There are some important steps to growing healthy seedlings indoors. Many people who attempt to grow seedlings indoors have disappointing results. With a little knowledge and effort, everyone can start seedlings indoors.
How To’s:
Planting a Garden - Seed Germination
Add Your Heading Text Here
The essentials for good germination are:
Viable seeds – good seeds that are not hollow and are not so old that germination rates are poor. You assume the seed is viable when purchased, but it is a concern if you save your seed or get some from a fellow grower.
Soi l- A good, seed starting mixture that is light and sterilized.
Water – The soil should be moist, but not soaked.
Warmth – Here is where growers can add to their success. Different seeds require different temperatures for ideal germination to occur. The ideal range for most, but not all seeds is somewhere between 70 to 85 degrees.
Did you know? You can warm your pots to a more ideal temperature by a variety of means. Some people buy heating mats. Others make a box and add a light bulb inside. These are two of a wide variety of ways to raise the temperature for better germination. We recommend you also have a thermometer to help maintain the proper temperature range.
Recommended Step by Step Process to Maximize Seed Germination
Select the pots or containers you want to use. Plastic containers with slots for individual plants are popular. Select size large enough for the roots to spread and not get “root bound”. Fiber containers are also popular, but roots can spread and make the separation more difficult.
Fill the pots with soil. Use a Seed Starter mix if you are a new grower. Many contain all the nutrients a new seedling will need in its first few weeks of life. Use of “Sterilized” soil is strongly recommended to minimize the risk of disease and even “critters” in the mix.
Experienced growers will create their own starter mix and add a concoction of several other things. I add a little ash from the fireplace and sometimes add mulch. If you use mulch, make sure it is clean of insects.
Sow the seeds carefully in the pots. The seed packet will contain planting depths and other instructions. A general rule of thumb is twice the diameter of the seed. For fine and tiny seeds, you can spread on top of the soil and they will submerge below the soil as you water them.
Water thoroughly and gently, but do not soak. Remember, the seed is only slightly below the surface.
Apply bottom heat if the room temperature is low. Once the plant has sprouted, stop the bottom heat as it can harm the roots.
Now the wait begins! Germination time is dependent upon several things: warmth and type of seed being the primary factors. Generally, a week to ten days for most seeds, but more or less may not be unusual.
Seeds do not need sunlight to germinate. The instant they begin to emerge, they need sunlight and lots of it.
Planting a Garden - Seedling Care and Nurturing
Upon emerging from the soil, gardeners breathe a big sigh of relief. The big first step has successfully occurred! You can almost see the flower you planted reaching its beautiful peak. You envision the blue ribbon at your local fair. Now, we immediately begin the new set of worries over nurturing the newborn indoors for a short while longer. There are real worries as most homes in springtime are cooler, shadier and damper than plants like.
Let there be light- – and plenty of it: The newborn seedling immediately needs light, as much and as direct as possible. Placing it by a window with southern exposure is the first step. But this alone may not prove to be enough for the seedling to grow healthy and strong. The sun is not up as long in the spring as it is in the summer. Second, there are many rainy spring days with little or no direct sun. And, many of us do not have a south-facing window. You should also acquire an artificial Grow Light and place the seedlings under it on cloudy days and at night. The seedling will benefit from as much sun, real and artificial, as possible.
Let There be Water- – in just the right amount: Provide water to the plants every couple of days. Do not soak the soil each night. Overly wet soil is one of the basic ingredients for damping-off disease. Let the soil dry out a little on the top, then water thoroughly.
Feed me, feed me: The seedling does not need a lot of extra nutrients at first. Your potting soil has some, the seed also had some stored inside of it. After several days, add a little Liquid Fertilizer to the water, but you do not need to give it full strength.
Let there be no damping-off disease
Those of us who have grown seedlings indoors for any number of years know what “Damping Off” disease is. This is a white mold that forms on the top of the soil. Damping Off disease flourishes in cold, wet damp weather along with little sunshine. It quickly spreads across the soil and wilts the seedling. Take its habitat away, and the disease can not survive. Your plants love just the opposite conditions. So the more you make conditions ideal for your newborn plants, the more likely you will avoid this problem.
If you do experience problems, do not give up hope. Here are some things you can do to minimize or eliminate disease problems:
First, get the plant in direct sunlight if at all possible.
Stop watering until the surface is very dry.
Scrape as much of the mold off the soil as possible.
Stir the top of the soil as much as possible. Do this once or twice a day. It will also speed drying.
Add some soil, although this may or may not produce results.
Increase room air circulation. You can gently blow air on your plant trays with a small fan.
Avoid sowing your seeds in the basement and leaving them there for a couple of days. While the trays are conveniently out of the way, this is a perfect breeding ground for Damping Off Disease.
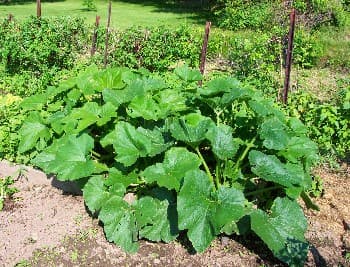
Planting a Garden Outdoors
The vast majority of plants can be started directly outdoors. The methods vary along with the type of plant. Read up on the plants you are using to assure proper planting.
Here are some useful steps and information on planting a garden, to guide you along the way:
Determine if the plants can withstand light frosts and freezes.
Find out the last frost dates for your area and time your planting accordingly.
Consider buying pretreated seeds or coating the seeds with a fungicide before planting.
Prepare, your garden soil.
Decide upon the method of planting your seeds- in rows or furrows, in hills. Also determine whether you will slightly elevate the mound the soil, or whether you will make a slight trench.
Plant the seeds according to the instructions on the packet. The most common problem of new and experienced growers is to resist the temptation to crowd them into a smaller space than the particular variety requires.
A word about seed depth: The most common mistake in planting is to sow the seeds too deep. The rule of thumb is to plant at twice the diameter of the seed. For fine seeds, spread them on top of the soil and water them in.
If your soil is dry, water thoroughly. Usually, in spring planting, there is enough water in the soil and more rain is on the way. Most seeds rot in wet soils, so make sure to provide good drainage.
For initial germination and growth, no fertilizer is needed. But, side-dressing the plants with a general-purpose fertilizer will help the new seedlings to thrive.
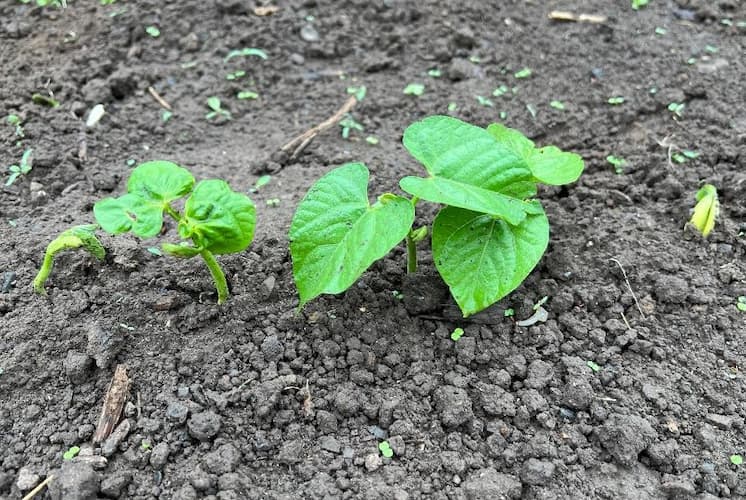
Planting a Garden - Transplanting Seedlings
The day you plant your seedlings is one of the more exciting and anxious days. Often we start the seedling too early and it is growing so big that it needs to get into the ground. Or perhaps it is not getting enough sunshine or you want to get that jump start on the season. Whatever the reason, it is important either to wait until the chance of frost is over, or be prepared to spend time protecting the young seedling.
Hardening off:
Seedlings should be “Hardened off” before they are planted into your garden. This is accomplished by setting them outside for several days before your planting date. Increase the amount of time each day into evening hours. This accustoms the plant to wider variations in temperature.
Tip: Toughen up the stem of tall plants to help them withstand winds that they do not experience indoors. You can do this by lightly brushing the tops of the plants with a newspaper or your hand. Do this two or three times a day, and in all directions. Repeat this for a few days before transplanting. The plant may temporarily slow its growth in height to concentrate on developing a thicker stem. This is good.
Here are some simple ideas and tips to get your growing season off to a good start:
If you have not yet prepared the planting site, do so a few days or a week before transplanting.
If you have grown the seedlings indoors, you should “harden them off” a few days before planting. This is accomplished by placing them outside during the day for a few days before planting. Each day extends the hours and makes sure to bring them in at night.
Dig a hole in the soil where you want the plant to go. Make the hole three or four times larger than the size of the roots.
For peat pots, you can place the plant pot and all right in the soil. You can make slits and/or holes in the peat pot to allow the roots to escape more readily. Use care not to disturb the roots or slice them.
If you are using plastic or fiber containers, carefully pull out a plant. Remember, the less you disturb the roots, the less transplant shock.
Fill in soil around the pot and plant. Use garden soil or mix in compost. You can cover any or all of the stem up to the primary(first) set of leaves.
Do not push the soil heavily down around the plant. You can always add nutrient-rich compost if the soil compacts and sinks.
Thoroughly the transplant immediately after planting with a light solution of Liquid Fertilizer.
Keep the soil around the seedling moist. Use a light solution of liquid fertilizer in the first few weeks as the roots will have plenty of nutrients if you prepared the bed properly. You need not water too deeply at first as the roots are shallow.
Avoid over-watering. You do not want to wash nutrients out of the bed that you prepared.
Transplanting Shock
Transplant shock is a temporary stunting of the leaves and branches of a plant immediately after transplanting. The plant temporarily re-focuses its energy to growing new roots due to damage that occurred in the transplanting process. As long as major damage was not made, the plant should recover and thrive. A little help from you will minimize the degree of transplant shock.
Here are some helpful tips and hints to aid your plant during planting and immediately after to avoid major transplant problems:
During planting treat your plant as gently as possible. Take care to minimize any disturbance to the roots.
“harden off” your plants. This is a process of exposing the plant to the outdoors for increasing amounts of time before transplanting.
Soak the roots with a liquid fertilizer the night before transplanting. This will help promote root growth and plant vigor.
Provide plenty of water immediately after transplanting and for a few days after transplanting.
Don’t pack down the soil. This only serves to disturb more roots.
Transplant during early evening hours if possible. This allows the plant to recover a bit at night and avoids a hot sun beating down upon adding to the plant’s stress.
If you have a choice, transplant during a cloudy day and cooler weather. If the weather is hot and cooler weather is in the forecast, your plant is further ahead if you wait a few days for the cold front to pass through.
Subscribe To Our Newsletter
Please support our site. Shop for:
How To Grow
Other Gardening
Our Community
Contact Us
- rmmatthews100@hotmail.com
- 585-721-6528
- Rochester, NY
©1999-2024 GardenersNet.Com, All Rights Reserved